EN
EN

Full Set Lash Packaging: Segment, Magnetic & Mascara as One Coordinated Line
Most lash brands do not start with a collection. They start with one product that works, add a second when a customer asks, and add a third when a competitor launches one. Three products later, the shelf looks like three companies.
That is the problem full-set packaging solves — and the reason it is harder to design than any single box.
A coordinated line has to do two opposite jobs at the same time. Sold as a bundle, the pieces must read as one collection, or the bundle looks like a clearance pack. Sold separately, each piece must stand on its own and name its own product clearly, or none of them sells. Both jobs come from the same artwork, and getting them wrong in either direction costs you the other channel.
This guide breaks down how we engineer that: the three-step line behind this set — a seven-row pre-glued segment box, a five-pair magnetic kit with liner and applicator, and a rose-gold mascara — the shared design system that makes them read as one family, and the per-product differences that let each stand alone.
👉Send us your full-set packaging requirement for a free sample and quote
Quick answer
A coordinated full-set lash line works when you fix the shared elements and let the product-specific elements differ.
Fix these across the whole line
- One board colour, locked as a Pantone spot colour.
- One logo treatment — same foil, same size, same position on every front panel.
- One typography scale, so product names sit on the same baseline grid.
- One finishing set — same lamination, same foil colour, same edge treatment.
- One material family, so the shelf does not mix textures.
- One specification file, so a reorder of one item does not drift from the others.
Let these differ per product
- Product name and category word, in the largest type on the panel.
- What is in the box — named plainly on the front, not only on the back.
- The window, only where a window earns its place.
- The tray, engineered to that product's own contents.
- The instruction surface, sized to that product's learning curve.
Fix too much and you get a set that only works as a bundle. Fix too little and you get three unrelated boxes again.
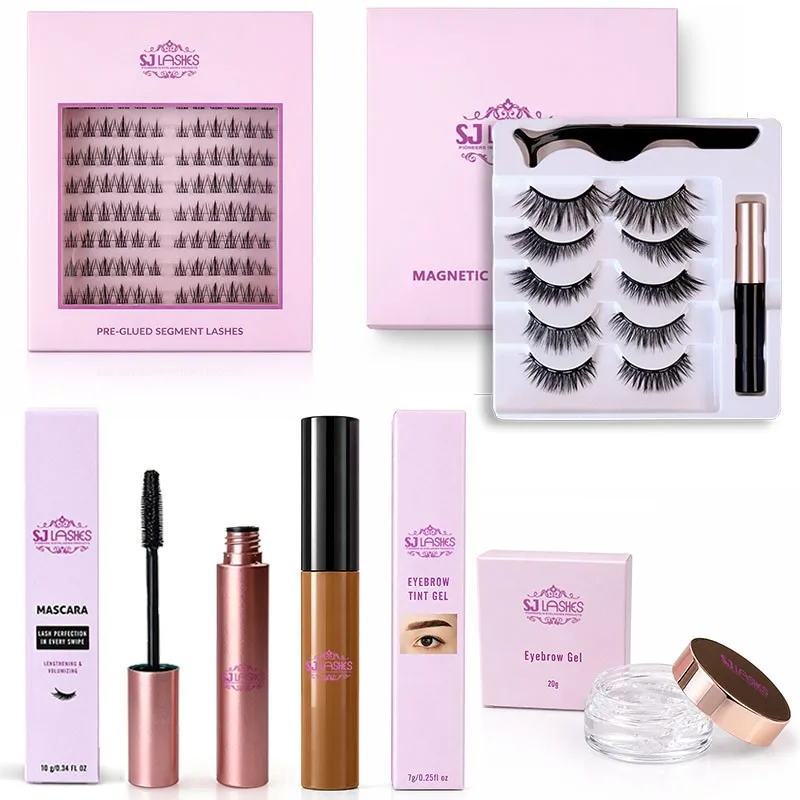
Image title: One Line, Five Pieces — Same Pink, Same Flourish, Five Different Jobs
The three steps, and what each box has to do
Step 1 — The pre-glued segment box: seven rows, split by eye
The segment box layers seven tidy rows of pre-glued clusters behind a transparent window, for precise, refill-style application.
What is interesting about the engineering is not the row count. It is that each row is split into a Left Eye half and a Right Eye half, with printed labels at the top of the tray and a divider between them. That single decision does a lot of work:
- It removes the "which one is which?" moment that costs a first-time user their patience.
- It makes the pack self-teaching without a leaflet, which matters because a pre-glued set ships with no adhesive instructions to lean on.
- It lets the customer count — she can see at a glance whether she has used more from one side.
- The divider doubles as structural reinforcement across a wide, thin lid.
The window carries the product; the printed labels carry the method. That division of labour is why this format reads as professional rather than as a bag of clusters.
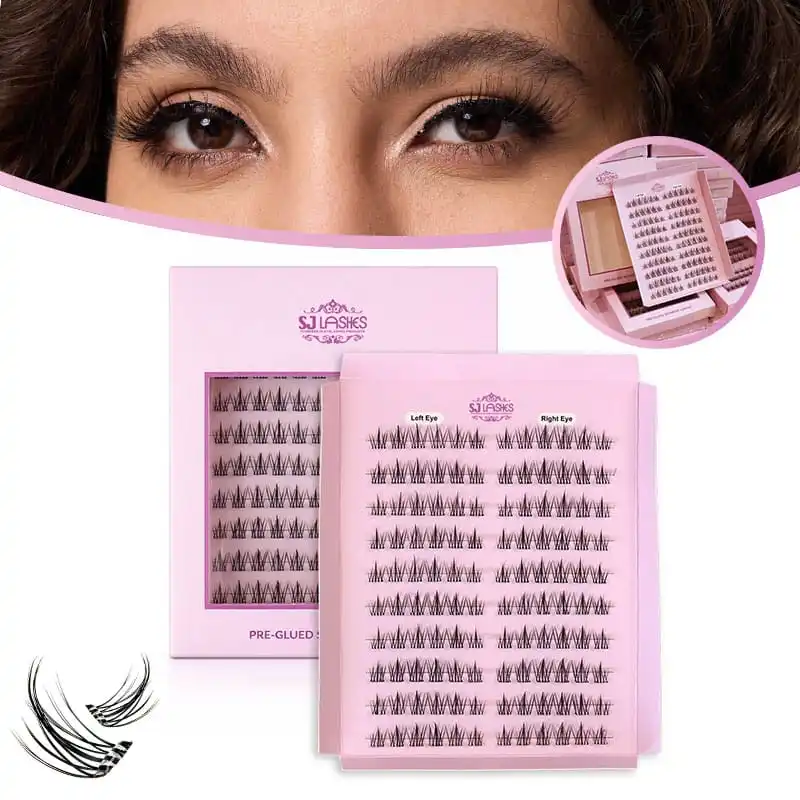
Image title: Left Eye, Right Eye — the Label That Replaces the Instruction Leaflet
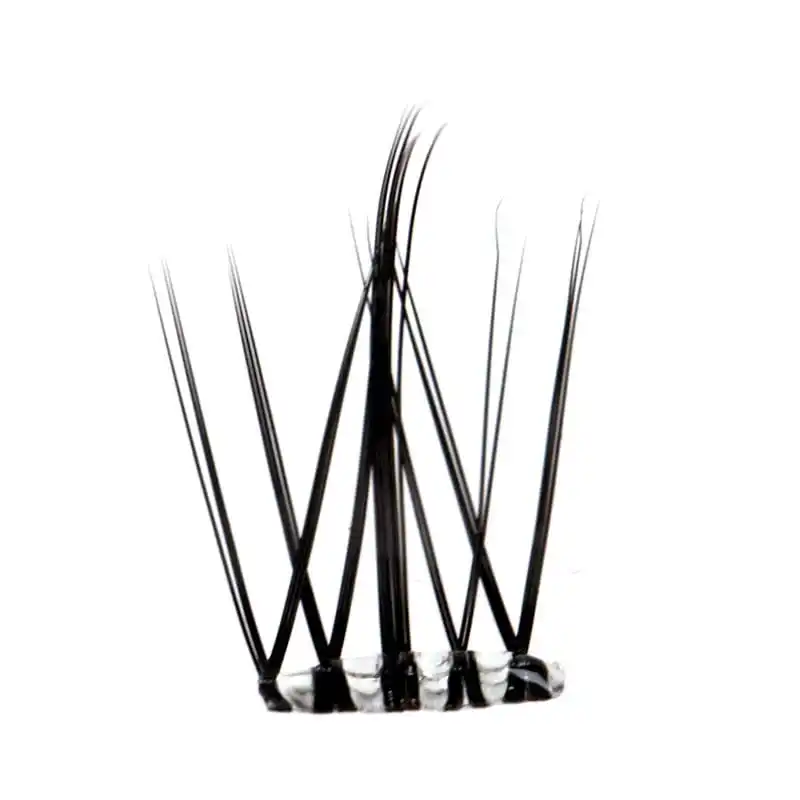
Image title: Seven Rows, Two Halves, One Divider Doing Structural Work
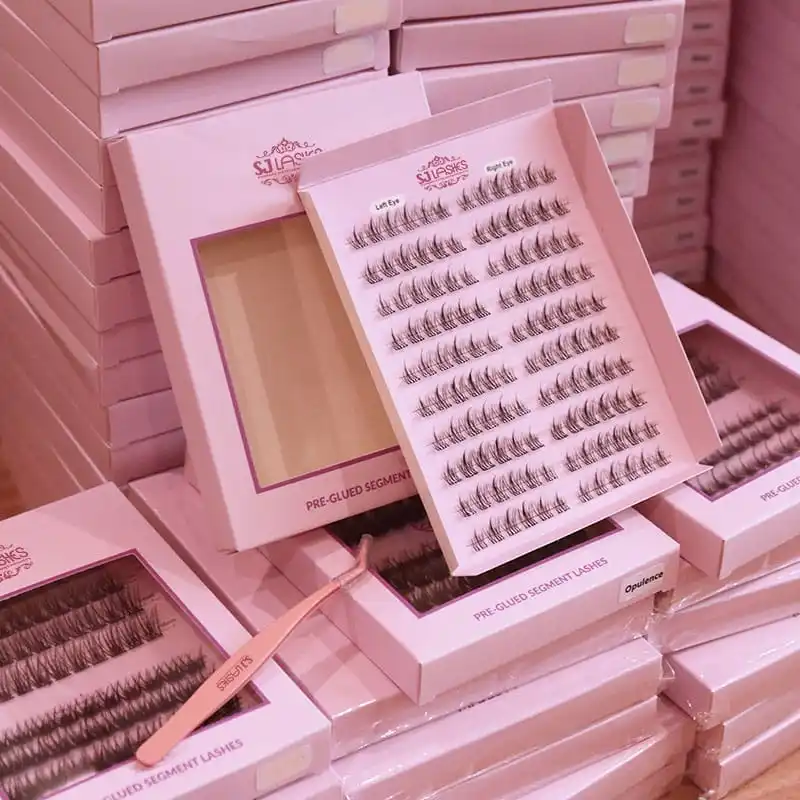
Image title: Slim Enough to Stack — the Load Case the Tray Has to Survive
Step 2 — The magnetic kit: five pairs, a liner and an applicator in one tray
The magnetic kit pairs five full-strip pairs with a curved applicator and a matching liner tube, so the whole lash line is set in one pass.
This is the hardest box in the set to engineer, for a reason that has nothing to do with print:
- It holds five different objects in five different materials. Lashes with magnetic bands, a rigid applicator tool, and a liquid liner in a tube. Three shapes, three weights, one tray.
- The lashes are the fragile part. Full-strip pairs are wide and thin. If the tray lets them shift, the strip kinks, and a kinked strip will not sit on a magnetic liner.
- The liner is the heavy part. A liner tube is the densest object in the set. Put it above or beside the lashes without a wall between them and it will find them in transit.
- The applicator is the long part. It sets the tray's minimum dimension, so it dictates the box's aspect ratio.
Get the tray right and the whole kit feels considered. Get it wrong and the customer opens the box to a pile of strips and a loose tube — which is exactly the experience the format was invented to avoid.
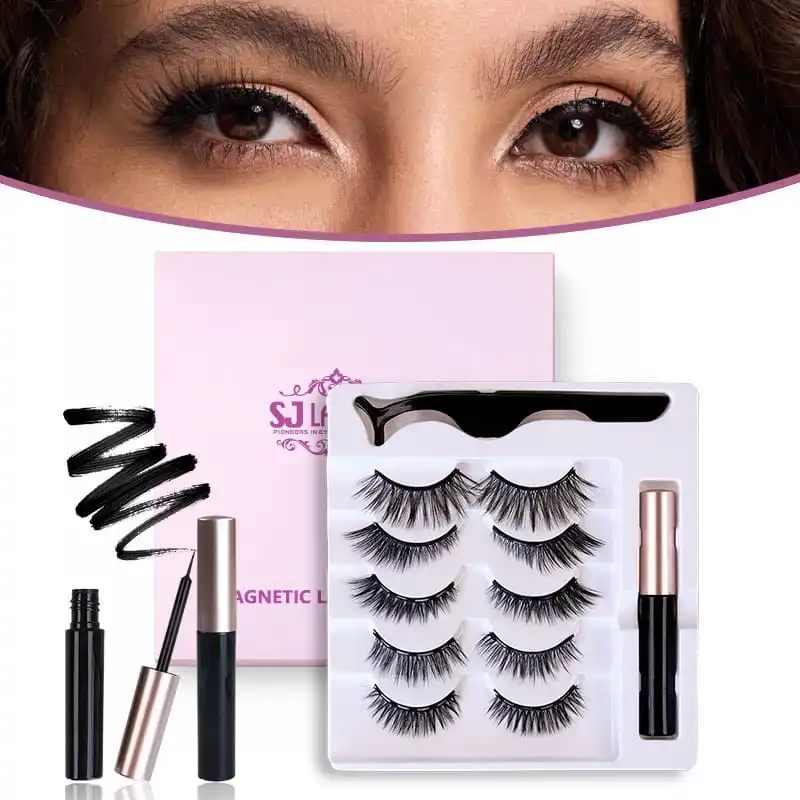
Image title: One Tray, Three Materials — Lashes, Tool and Liquid
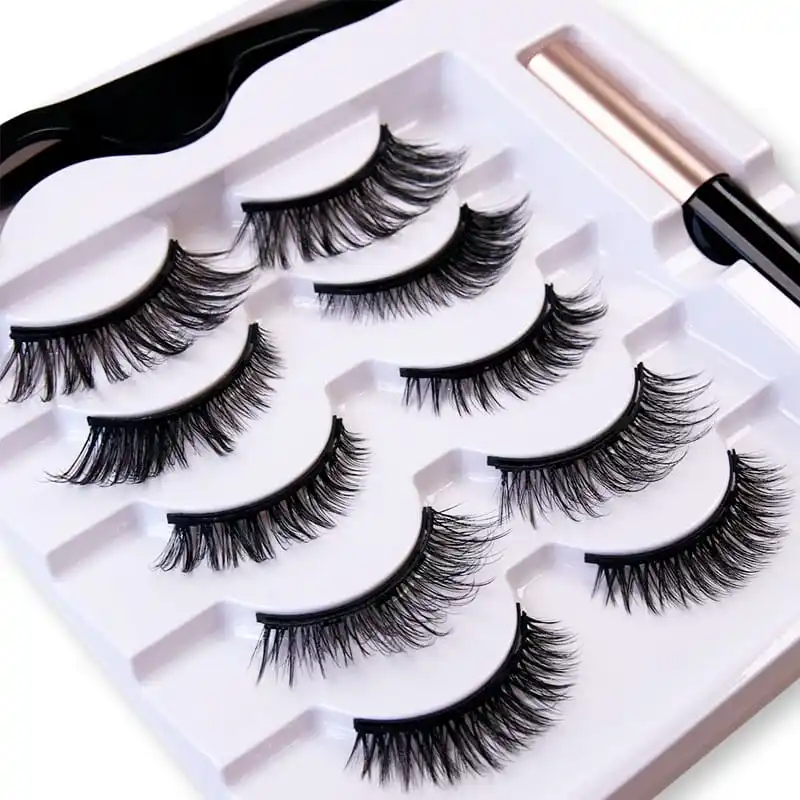
Image title: Moulded Pockets, Not Slots — the Strip Must Not Be Able to Shift
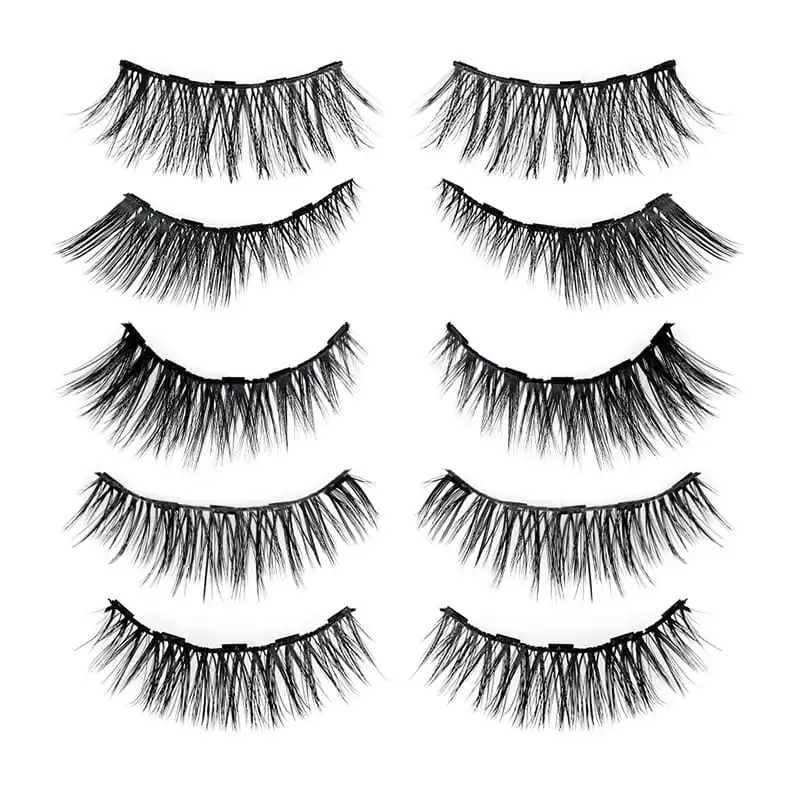
Image title: Five Pairs Means Five Styles — the Range Is Part of the Offer
Step 3 — The mascara: the repeat-purchase item in the set
The slender mascara box, with its metallic rose-gold tube, finishes the eye with length and volume.
In commercial terms the mascara is the most valuable piece in the bundle, because it is the one that runs out. Segments and magnetic strips get reused; mascara does not. A bundle that includes a consumable has a built-in reason to come back — so the mascara box should be designed to be bought alone, repeatedly, not only as part of the set.
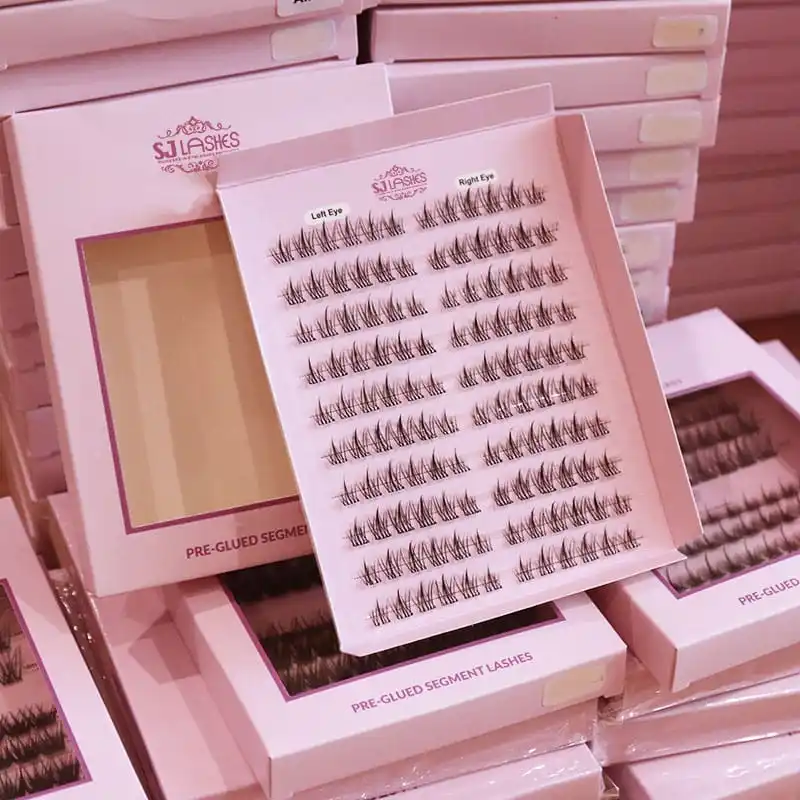
Image title: The Consumable — Design It to Be Bought Alone, Repeatedly
The extended family
The same design voice scales beyond the three core steps. Our reference set runs it across a brow tint gel box and a glass brow gel jar with a rose-gold lid — same pink, same flourish, same foil — which is what makes a lash brand read as an eye-category brand rather than a lash-only vendor.
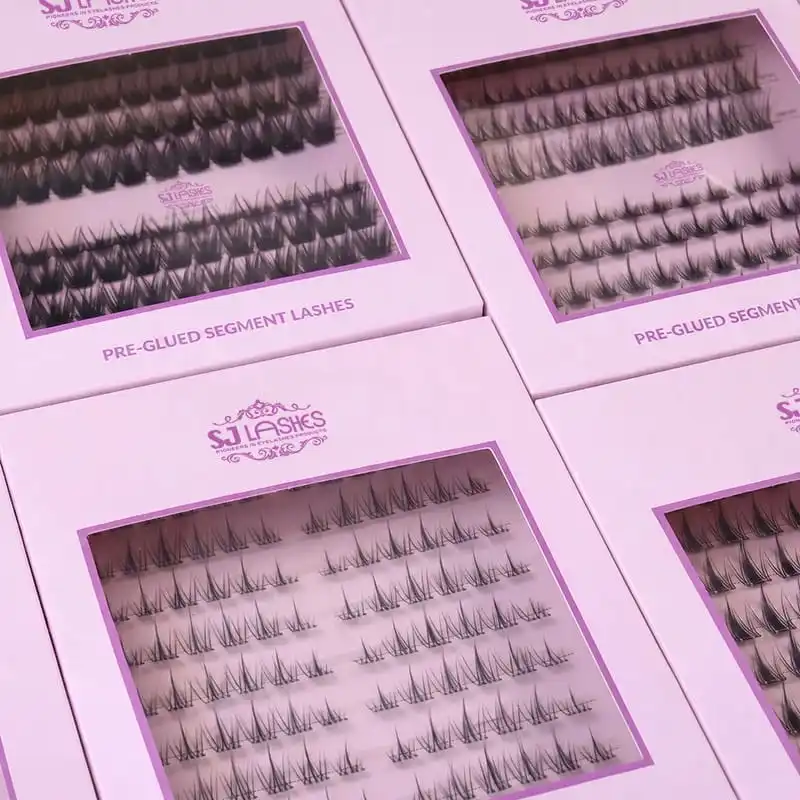
Image title: Same Voice, New Categories — How a Lash Line Becomes an Eye Line
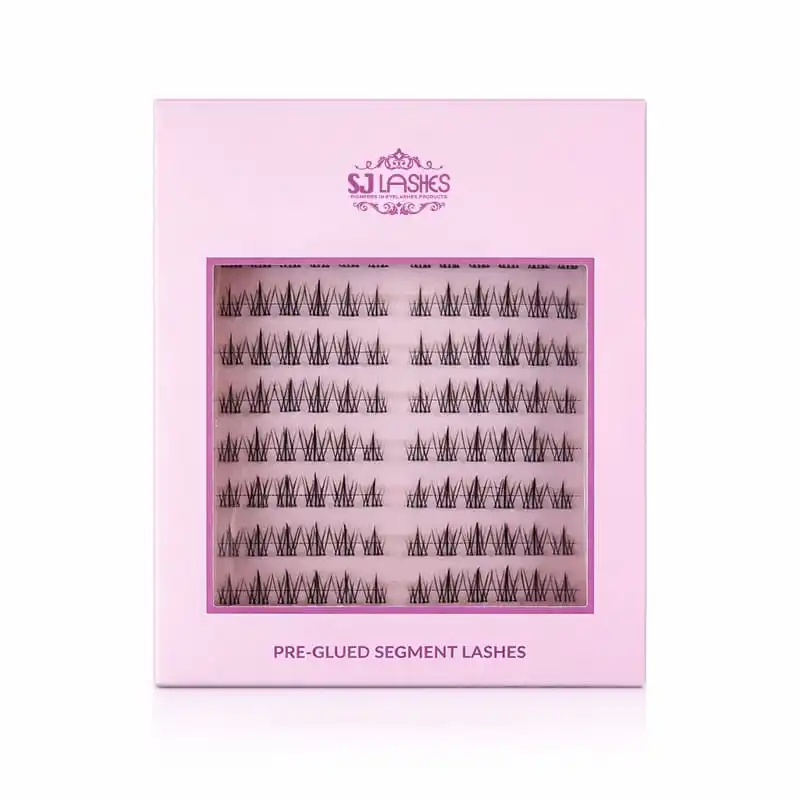
Image title: Style Variants Within One Box Format — the Cheapest Range Extension You Have
The shared design system: what to lock
Six things, and they should be locked in a specification file before the second product is designed, not after the third.
1. One board colour, as a Pantone spot
Four-colour process pink drifts between runs, between board weights and between a box and a label. If the pink is part of your identity — and in a coordinated line it is — lock it as a spot colour and use the same reference across every component. The alternative is a shelf where three boxes are nearly the same pink, which looks worse than three clearly different pinks.
2. One logo treatment
Same foil, same size, same distance from the top edge, on every front panel. The logo is the thread that ties the line together, and it only works if it is identical — not "similar".
3. One typography scale
Product names should sit on the same baseline grid and the same size across the line. This is what makes a set look designed rather than assembled.
4. One finishing set
Same lamination across all pieces. Matte and gloss side by side on one shelf reads as two brands, even when the colour matches.
5. One material family
If one box is coated art paper and the next is a specialty textured stock with no visual logic, the shelf looks accidental. Choose one primary material and use texture as an accent, deliberately.
6. One specification file
Board, colour reference, foil, lamination, dieline, tray tooling, insert layout, print positions. One file, shared across products. This is the unglamorous element that decides whether the third reorder still matches the first.
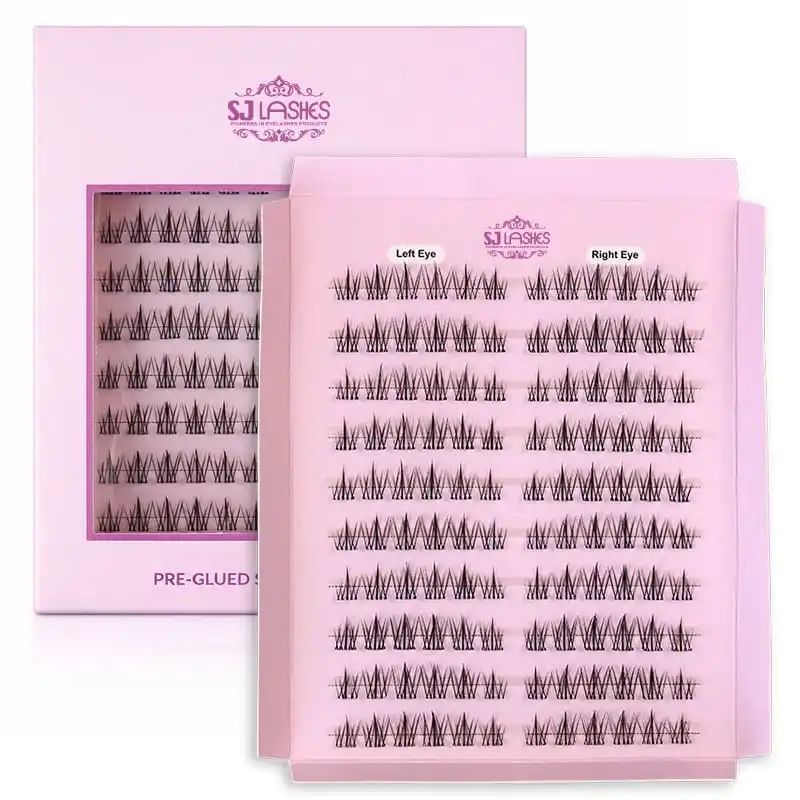
Image title: One Logo Treatment, Repeated — the Thread Through the Line
What must differ, so each piece can stand alone
A set that only works as a bundle is a set that is sold once.
- Name the product plainly on the front. Category word first, at the largest size on the panel. A customer picking up one box off a shelf has no context from the others.
- State the contents numerically. Five pairs. Seven rows. Whatever the number is, print it — a magnetic kit buyer wants to know she is getting five pairs before she opens the lid.
- Use a window only where it earns its place. The segment box needs a window because the row structure is the offer. A mascara box does not need a window to sell mascara; the tube shape does that.
- Engineer each tray to its own contents. A shared tray across a line is a false economy. The segment tray and the magnetic kit tray are doing completely different jobs.
- Size the instruction surface to the learning curve. Magnetic liner needs four steps and a visual; wearing pre-glued segments needs a label. Print what each product actually needs.
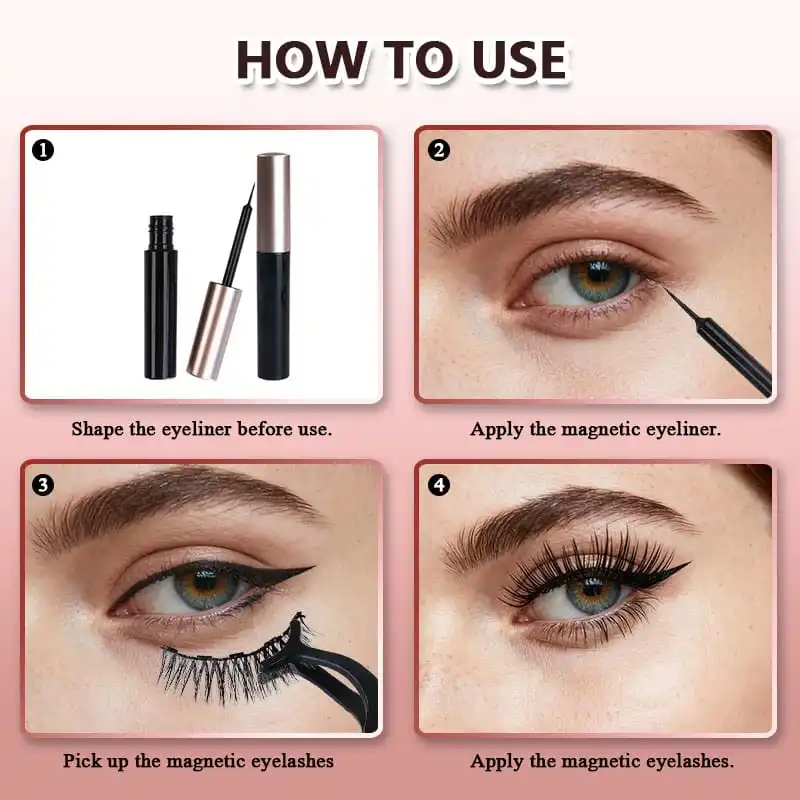
Image title: Four Steps, Printed Once — the Surface Sized to the Learning Curve
Tray engineering for a multi-material kit
If you take one technical point from this guide, take this one: the tray, not the box, decides whether a multi-product kit survives shipping.
The magnetic kit is the clearest case. Four rules we work to:
- Mould pockets, do not cut slots. A vacuum-formed pocket that follows the lash strip's curve holds it along its length. A slot lets it move.
- Separate the heavy from the fragile with a wall. The liner tube gets its own channel, physically divided from the lash pockets. Weight migrates in transit; a wall stops it.
- Let the tool set the aspect ratio, then fit the rest around it. Find the longest object first, or you will redesign the box later.
- Test the drop, not just the look. Fill the kit, drop the carton from handling height, and open it. If the strips have moved, the tray is decorative.
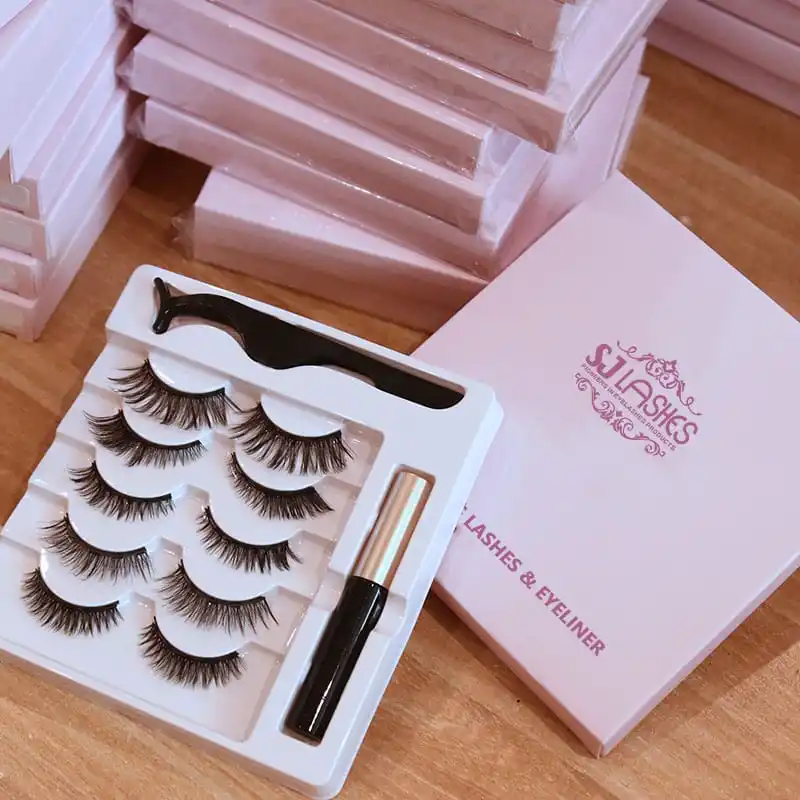
Image title: Pockets, Recesses and a Divided Channel — Three Different Jobs in One Tray
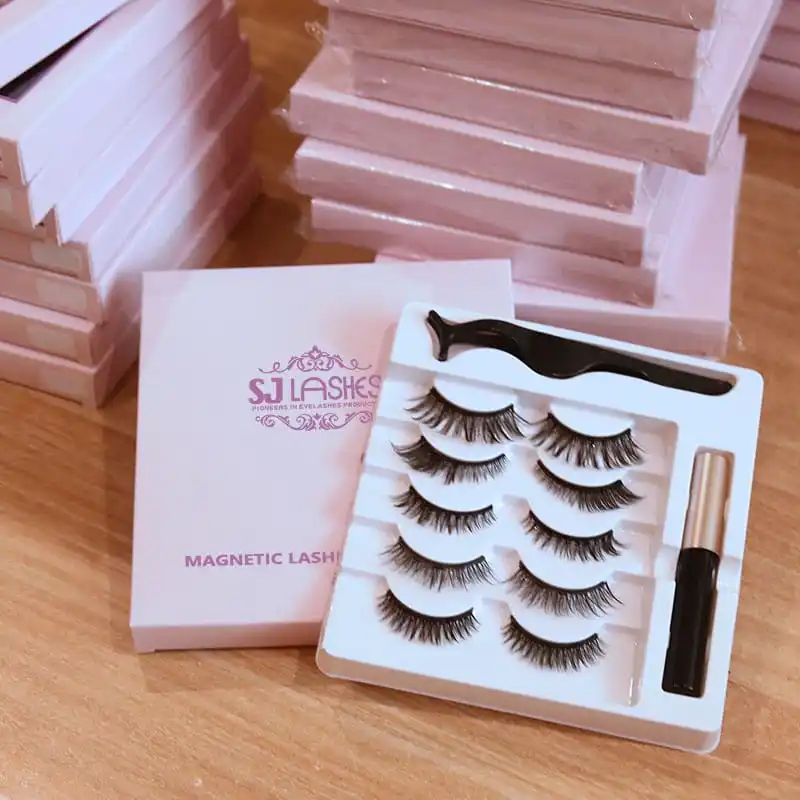
Image title: The Unboxing Moment the Tray Is Working For
Customization options
- Box format — rigid gift box for the bundle, folding carton for standalone retail entries.
- Window shape and size — rectangle, heart or teardrop; aperture sized to show a full pair or a single segment.
- Tray layout — row count, left/right split, pockets, recesses and divided channels.
- Set contents — which products ship together, and whether each is also sold alone.
- Mascara tube finish — metallic rose gold, other metallics, or direct logo printing on the container.
- Logo placement — applied consistently across the whole line, in one foil colour.
- Print finishing — CMYK or Pantone spot, hot foil stamping, spot UV, debossing or embossing, gloss or matte lamination.
- Structure options — rigid boxes at 1.5mm, 1.8mm or 2.0mm with magnetic closure or lift-off lid, or coated art paper cartons at 250gsm, 300gsm or 350gsm.
- Instruction surface — printed panel, insert card or belly band, sized per product.
Explore our all-in-one packaging service for coordinated multi-product lines.
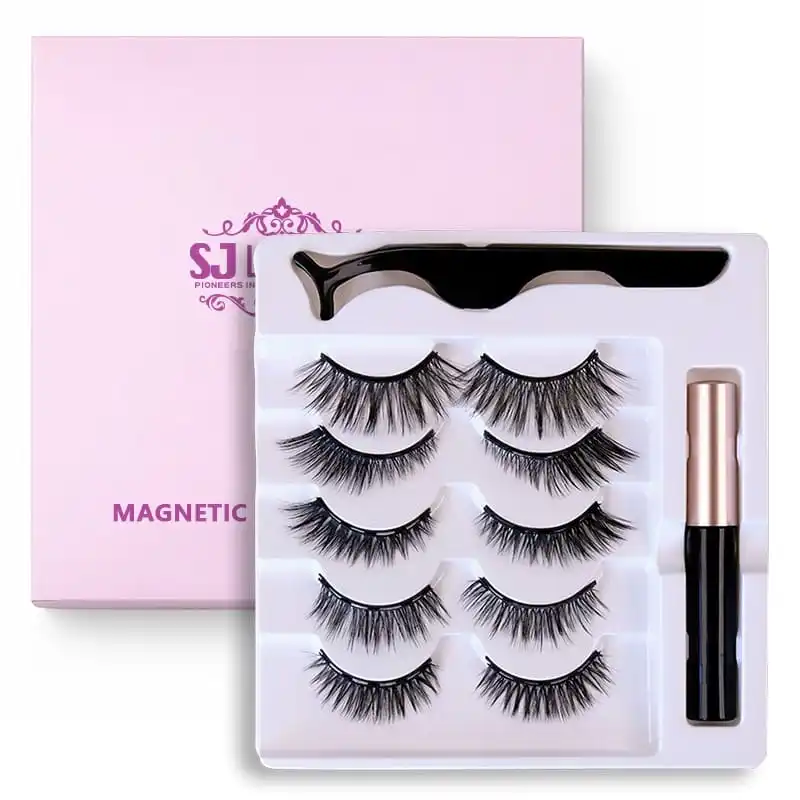
Image title: Closed It Reads as a Brand; Open It Reads as a Kit
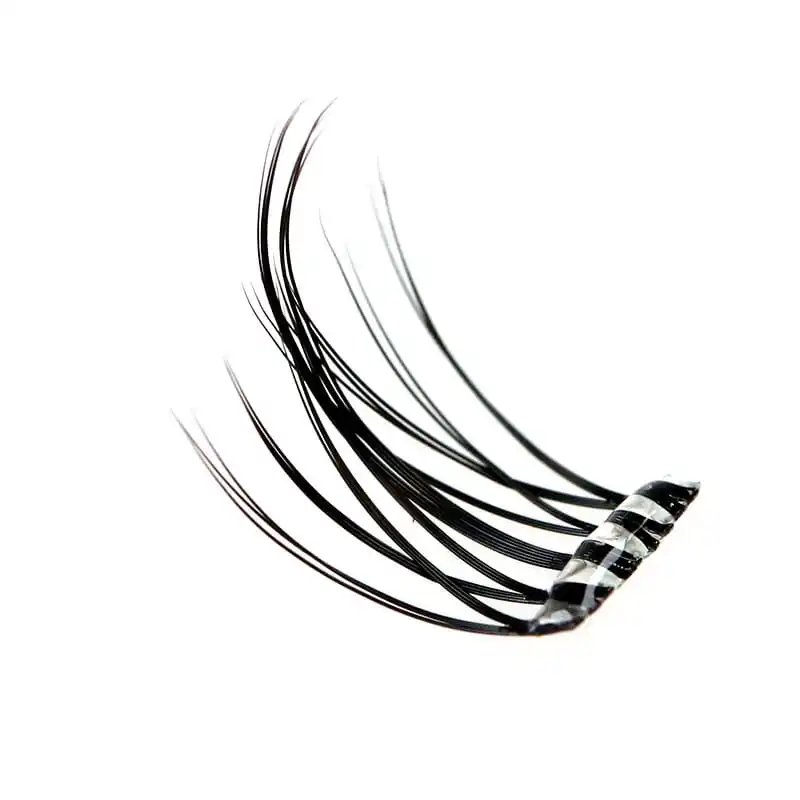
Image title: What the Window Is Actually Selling — the Cluster and Its Pre-Glued Base
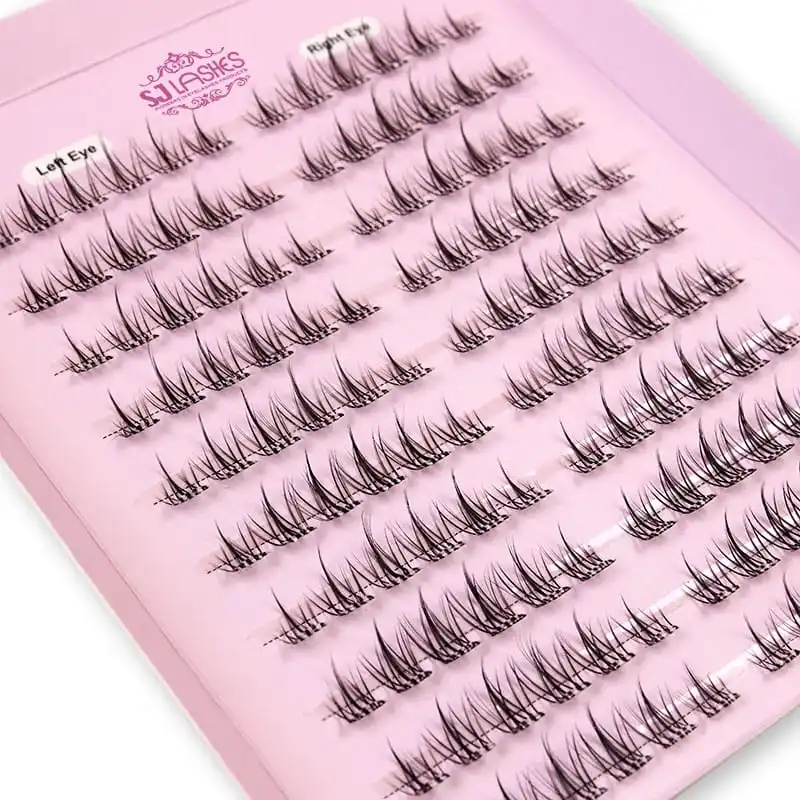
Image title: Confirm the Cluster Before You Confirm the Tray
Supplier scorecard and sampling
What to ask
- Can you produce every piece of the line from one specification file so the pink and the foil stay identical?
- Which components can share a dieline, and which genuinely need their own?
- Can you mould a tray to hold lashes, a rigid tool and a liquid tube together without contact?
- Can each piece be tooled for standalone sale as well as bundle assembly?
- Can you print a left/right eye label inside the segment tray, and how fine can the type be?
- Can the same logo treatment be applied across board, tube and glass jar?
- What is the reorder lead time per component, and how is tooling archived?
What to check on the sample
- Line-up test. Put every piece side by side under one light. Any piece that reads as a different brand goes back.
- Standalone test. Cover four of the five pieces and look at the fifth. Can you tell what it is and what is in it? If not, its front panel is not finished.
- Bundle test. Assemble the full set and photograph it as a main image. If it does not look deliberately curated, the shared system is too loose.
- Ship test. Fill and drop a carton of magnetic kits. Open it and check the strips have not shifted.
- Colour test. Compare the pink across board, tray, label and tube under retail lighting, not on a monitor.
- Repeat test. Order a second batch and compare it with the first, side by side.
Channel notes
Bundle as a gift set. A rigid box with magnetic closure, satin ribbon and a coherent colour line turns three mid-priced products into one high-ticket purchase. The bundle is where the coordinated design pays for itself.
Selling the pieces separately. This is the harder channel and the one most sets fail. Each front panel has to carry its own product name, contents count and reason to buy — independent of the family it belongs to.
Marketplace and social. The collection photographed together is your best main image; the individual boxes are your variant images. A coordinated line gives you five listings from one photoshoot.
Subscription and refill. The mascara and the magnetic liner are the consumables. Design their boxes to be bought repeatedly and alone, and the line keeps earning after the first sale.
Salon and professional. Professionals buy in multiples and care about tray logic and refill behaviour. A tray that opens cleanly and holds its shape after a hundred uses matters more here than decoration.
OEM workflow
- Choose the line-up — which products, and which of them will also sell standalone.
- Fix the shared system — colour as a spot reference, logo treatment, typography scale, finishing set, material family. Lock it before designing product two.
- Engineer each tray separately — to that product's own contents and load case.
- Design each front panel for standalone legibility — product name, contents count, reason to buy.
- Physical sample and line-up test — all pieces side by side, then the standalone test.
- Produce and archive — one specification file per component, tooling archived for consistent reorders.
Quote request checklist
- Target market and channels (bundle, standalone, both).
- Which products are in the line, and which sell alone.
- Product formats — segment row count, magnetic pair count, mascara size.
- Tray requirements per product, including any divided channels.
- Window requirements — which pieces need one, and where.
- Brand colour reference as a Pantone spot value.
- Foil colour and logo placement rules for the line.
- Board weights, lamination and structure per component.
- Instruction surface per product.
- Label content requirements for your target market.
- Sample quantity, first order quantity, and delivery window.
👉Request a free sample and quote for your full-set lash packaging
Compliance and honest claims
- Keep the shelf life and wear claims factual. Do not publish hold times or wear durations unless the finished product documentation supports them.
- Magnetic liner is a cosmetic product and carries cosmetic labelling obligations in most markets — ingredient declaration, batch code and market-specific language requirements. Confirm before print.
- Liquid and adhesive components carry the strictest labelling of anything in the set. Budget more compliance time for the liner and mascara than for the boxes.
- Avoid absolute claims — "all eye shapes", "smudge-proof for 24 hours" and similar wording needs substantiation and market review.
- Include patch-test guidance and stop-use instructions where appropriate, and keep the disclosure consistent across every piece in the line.
- Do not treat bundle artwork as exempt. A box that only ships inside a bundle still reaches the consumer, and still has to comply.
Requirements differ between markets. Confirm the final content for your target market with your compliance adviser before the print run.
Why SJ LASHES
- One factory for the whole line — lashes, liquids and packaging produced under one roof, which is what makes a single specification file possible.
- Tray engineering for multi-material kits: moulded pockets, divided channels and vacuum trays built around what is actually going in the box.
- Colour and foil control — Pantone spot matching and lamination held consistent across board, tray, tube and label, so a coordinated line stays coordinated on reorder.
- Structure range — rigid gift boxes from 1.5mm to 2.0mm with magnetic closure or lift-off lid and satin ribbon, plus folding cartons from 250gsm to 350gsm.
- Window customization — rectangles, hearts and teardrops with 10 mil to 14 mil PVC film, sized to show a full pair or a single segment.
- Low MOQ with fast sampling, so you can test a coordinated launch before committing to the full line.
See our all-in-one packaging, cluster lash kit boxes, cluster lashes paper boxes, magnetic lashes and lash liquid packaging ranges.
FAQ
What is full-set lash packaging?
A coordinated packaging line covering several lash products — typically pre-glued segment lashes, a magnetic kit and a mascara — designed so the pieces read as one collection when bundled and as standalone products when sold separately.
Should I sell my lash products as a bundle or separately?
Both, if the design allows it. A bundle raises order value; standalone sales raise volume. The packaging has to carry product-specific naming and content counts on every front panel, or the pieces will not sell outside the bundle.
How many rows should a pre-glued segment box hold?
Row count depends on your cluster count and price point. Seven rows in a left/right split is a proven configuration, and the split itself matters more than the total — it removes the guesswork that costs a first-time user their patience.
Why does the magnetic kit need its own tray design?
Because it holds three materials at once: flexible lash strips, a rigid applicator and a liquid liner tube. The tray has to hold the strips without letting them shift, keep the heavy tube away from them, and accommodate the longest object in the box. A generic tray will not do all three.
Can I use one tray across all the products in my line?
No, and trying to is a false economy. Each product has a different load case. Sharing a tray means one product gets a tray that does not fit it, and that is the product that generates the complaints.
How do I keep the colour consistent across boxes, tubes and labels?
Lock your brand colour as a Pantone spot value and reference that same value across every component and every reorder. Four-colour process matching drifts between runs and between substrates — which is exactly how a coordinated line stops looking coordinated.
Which piece of the set should I design first?
The longest, most awkward object. In a magnetic kit that is the applicator, because it sets the box's aspect ratio. Find that dimension first, then fit the rest around it — otherwise you will redesign the box after the tray is tooled.
What is the minimum order for a coordinated full-set packaging line?
It depends on how many components share tooling and how many need their own dielines and trays. Share your line-up and target quantities and we will confirm what is achievable for a first launch.
Final thought
A coordinated line is not five boxes in the same colour. It is one design system with five different jobs — and the discipline is knowing which elements to lock and which to let differ.
Lock the pink, the foil, the type scale and the specification file. Let the name, the contents, the tray and the instruction surface be specific to each product. Then the set reads as a collection on a bundle shelf and as a product on a single shelf, which is the only outcome that earns the investment.
Request a free sample and quote from SJ LASHES
For more packaging development, factory footage and application education, follow SJ LASHES on Instagram and read the SJ LASHES blog.