EN
EN

Building a Complete DIY Lash Series: Glue-Free Segments, Adhesive and Packaging as One Line
Most lash brands launch a product. The ones that build a business launch a series.
A single glue-free segment box competes for one purchase. A series — segments, the adhesive that goes with them, and a colour line that gives the same customer a reason to come back — competes for a routine. And in the DIY lash category, the routine is where the repeat revenue lives: the segments run out, the adhesive runs out, the customer who liked the purple glitter wants the gold.
This guide walks through a complete series as one system: a glue-free segment box in a white slide-out drawer, a 5ml eyelash adhesive in its own printed carton, and a colour segment line in window boxes. It covers what each component does commercially, how to make three different products read as one brand on a shelf, how to specify them, and what to send when you request a quote.
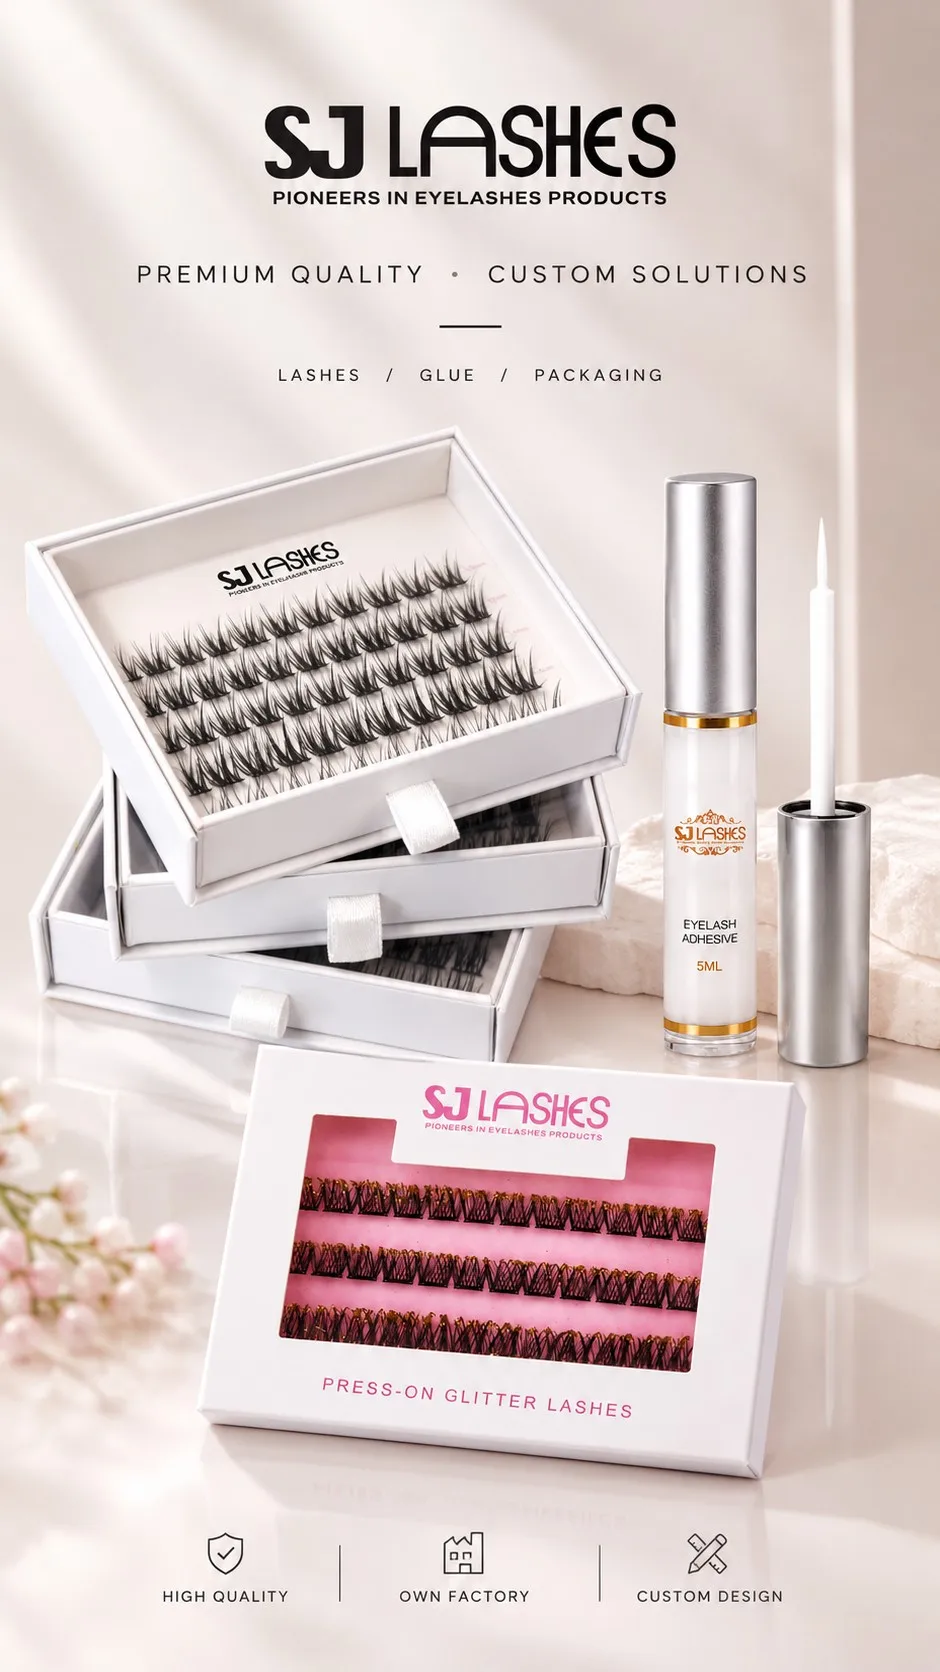
One Series, Three Components — Lashes, Glue, Packaging
Quick answer
A DIY lash series works when three components are built as one line rather than three separate purchases:
- The segment box — glue-free segments, presented so the customer can see and count them. Here: a matte white sleeve over a white tray, with the logo held back on the inner wall so the product is what the buyer sees first.
- The adhesive — the consumable that creates the repeat purchase and completes the routine. Here: a 5ml brush-tip adhesive with a silver cap, matched to a white printed carton.
- The colour line — the reason to buy again and buy more than one. Here: glitter segments in gold, blue, purple and silver, in white window boxes over pink trays.
The commercial logic is that components 2 and 3 are consumables and collectables; component 1 is the entry product. Built in one visual language, they shelf as a single block. Built as three separate designs, they compete with each other.
Why a series beats a single SKU
Consumables create the repeat cycle
A segment box is bought occasionally. Adhesive is bought repeatedly — it is used up, it dries out, it gets lost in a makeup bag. If your series does not include the adhesive, that repeat purchase goes to whoever else sells one, and the customer relationship resets each time.
The same applies to segments in a colour line: a customer who likes a format tends to collect variations. Four colours in the range is four opportunities to sell to someone who already trusts the format.
A series buys shelf space instead of renting it
Retailers and marketplaces reward brands that fill a defined space. A block of one white carton family reads as a brand; three unrelated boxes read as three small suppliers. In practice, a series gives you a defensible shelf presence at a fraction of the marketing cost of a single hero product.
It makes bundles obvious
Once the components exist in one language, bundling stops being a discount tactic and becomes a product: segments plus adhesive as a starter kit, four colours as a collection, a gift set with a matching outer box. The packaging is already coordinated, so the bundle needs no new artwork.
It reduces the risk of a single-format launch
If the glue-free drawer box underperforms, a series still has the adhesive and the colour line carrying revenue. A single-SKU launch has nothing to fall back on.
Component 1 — The glue-free segment box in a white slide-out drawer
What it does
This is the entry product and the brand statement. Its job is to make a glue-free format look premium without looking complicated, and to present segments so a customer can judge them before buying.
How the design works
The photographed box keeps quiet until it is opened. A matte white sleeve sits over a white tray, and the wordmark is held back on the inner wall in pink — so the first thing a buyer sees is product, and the brand arrives half a second later as the drawer slides. It is a small piece of sequencing, and it is why this box reads as considered rather than decorated.
Two functional details carry the daily experience:
- Printed guides. Pink printed guides run across the card beneath the rows, giving every segment a position and a count without spending a line of copy on it — the sort of index a technician notices on the second use and then relies on.
- A centred, flat pull tab. The drawer opens with one thumb and closes without a fight. Rows of segments sit at a consistent angle in the tray, so the set looks the same on the tenth use as on the first.
The box is also slim enough to stack, which is the commercial point: a shelf of them reads as one white block, and a colour accent is spent only where it earns attention.
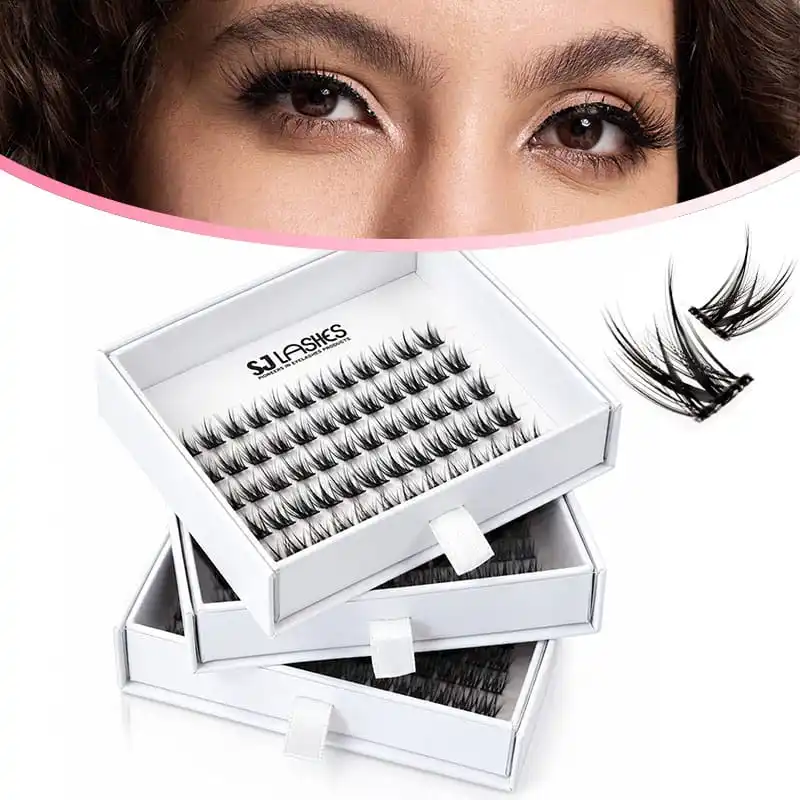
The Drawer Reads as One White Block on the Shelf
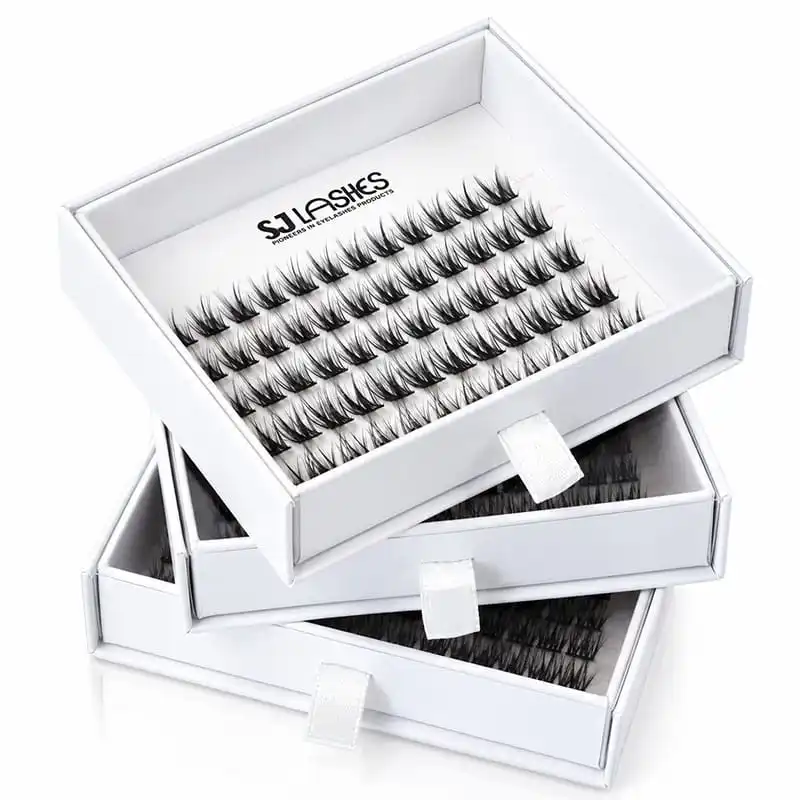
One Thumb to Open, No Fight to Close
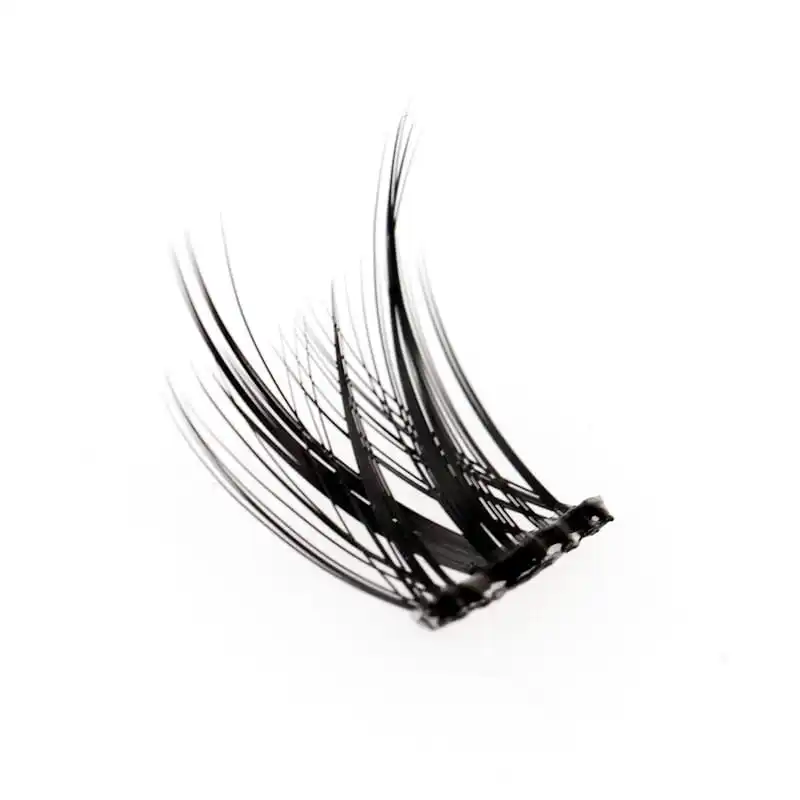
What the Customer Is Actually Buying — One Segment at a Time
What you can customize
Sleeve stock, tray colour, logo colour and placement, printed guides, row count and lash style are all customizable with your logo. Low MOQ with fast sampling makes a first run realistic.
How to specify it
- Row count and style — how many rows, how many segments per row, and at what angles.
- Sleeve and tray stock — matte or gloss, white or tinted, paper weight matched to how the box will ship.
- Logo treatment — where the wordmark sits, and which surface carries it. Holding it back on the inner wall is a design decision worth copying; putting it on the sleeve front is the safer default.
- Printed guides — the index lines and any numbering that help during application.
- Pull tab — material, colour and whether it sits flat enough to stack.
- Stacking profile — if the box is meant to shelf as a block, check the height tolerance across a run.
Component 2 — The adhesive, and why its packaging matters more than its size
What it does
The adhesive is the smallest item in the series and the most important commercially, because it is the consumable. It is also the component most often treated as an afterthought — a plain tube with a sticker, shipped beside a beautifully designed lash box.
How the design works
The photographed adhesive is a 5ml brush-tip adhesive in a clear body with gold rings top and bottom, a silver metallic cap, and a fine white applicator brush. The brand is applied in a gold flourish over the tube. It is presented in a white vertical carton carrying the logo in pink, so the adhesive and the segment boxes share a palette even though they look nothing alike in form.
Two details are doing the commercial work:
- The silver cap and gold rings. Metal finishes are the cheapest premium signal in liquid packaging, and they let a 5ml tube sit credibly beside a premium lash box.
- The fine brush applicator. For a DIY customer, applicator control is the product. A brush that lays a thin line along the band is what makes the difference between a clean application and a mess — which is why the applicator deserves to be shown in the product photography, not hidden inside the tube.
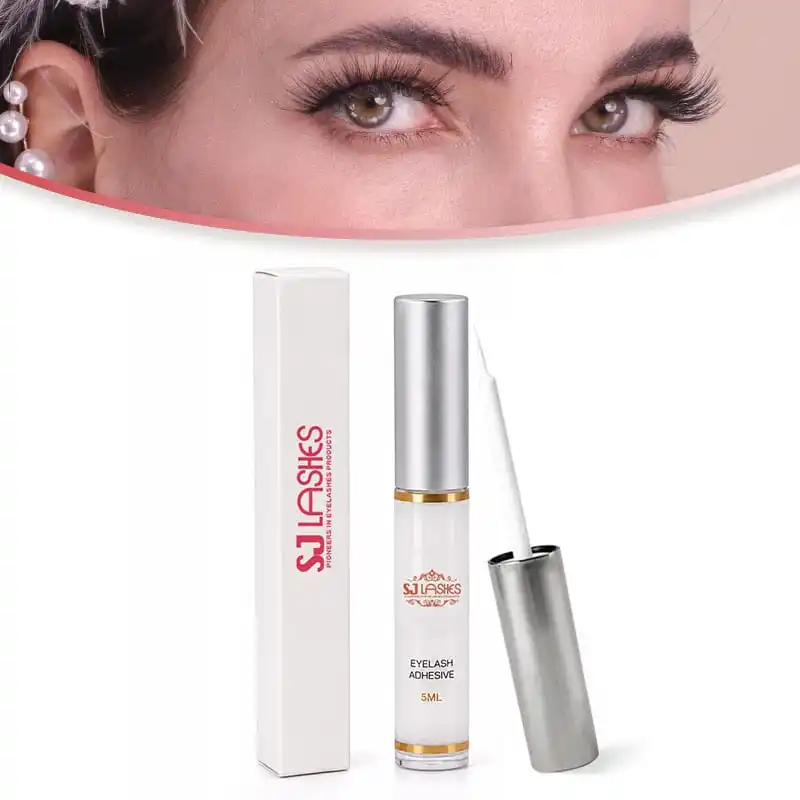
The Smallest Item, the Most Frequent Reorder
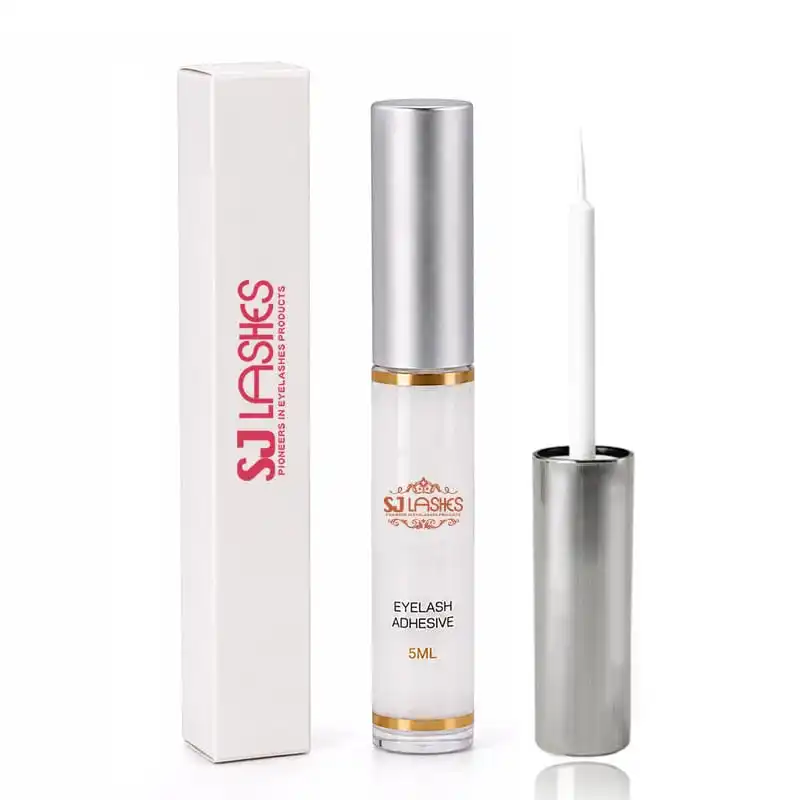
Show the Applicator — It Is the Product
How to specify it
- Volume — 5ml is a common retail size; larger sizes suit professional or bundle positioning.
- Closure — cap finish and colour, and whether it matches the metal tone used elsewhere in your series.
- Applicator — brush, doe-foot or precision tip, specified against the application method you teach.
- Decoration — direct printing on the tube, a label, or a printed carton around it. All three are viable; the carton adds retail presence and a surface for mandatory information.
- Carton — dimensions, board, and label fields. Confirm what your market requires on the carton before artwork.
- Claims discipline — see the compliance section below. Adhesive claims are the easiest place for a brand to overreach.
Component 3 — The colour segment line
What it does
The colour line converts a customer into a collector. Glitter and colour segments are the most shareable item in a DIY lash range — they photograph well, they demonstrate well on video, and they sell as a second or third purchase to someone who already owns the neutral set.
The photographed range runs gold, blue, purple and silver glitter segments on pink trays, three rows per tray, with the bulk trays shown in a grouped shot and the retail versions presented in white window boxes over pink trays, under a printed line name.
Why the colour line should share the parent packaging
The instinct is to make colour SKUs louder. The stronger move is the opposite: keep the box identical and let the product supply all the colour. A white window box with a pink tray puts the glitter on display and keeps the range visually ordered — which is exactly what makes a shelf of four colours read as one collection instead of four competing products.
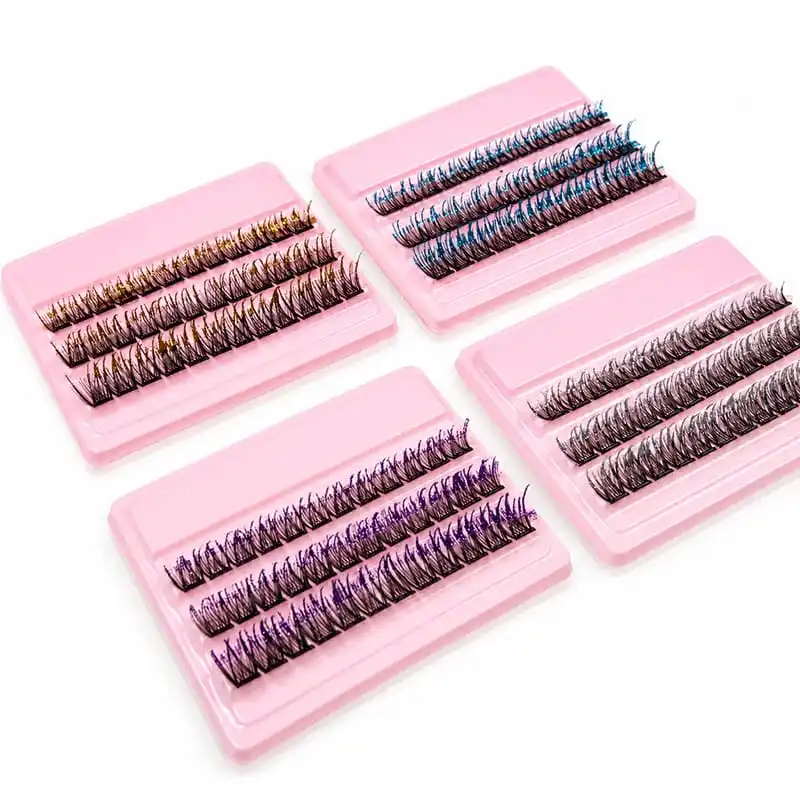
Four Colours, One Format — the Collection Logic in a Single Frame
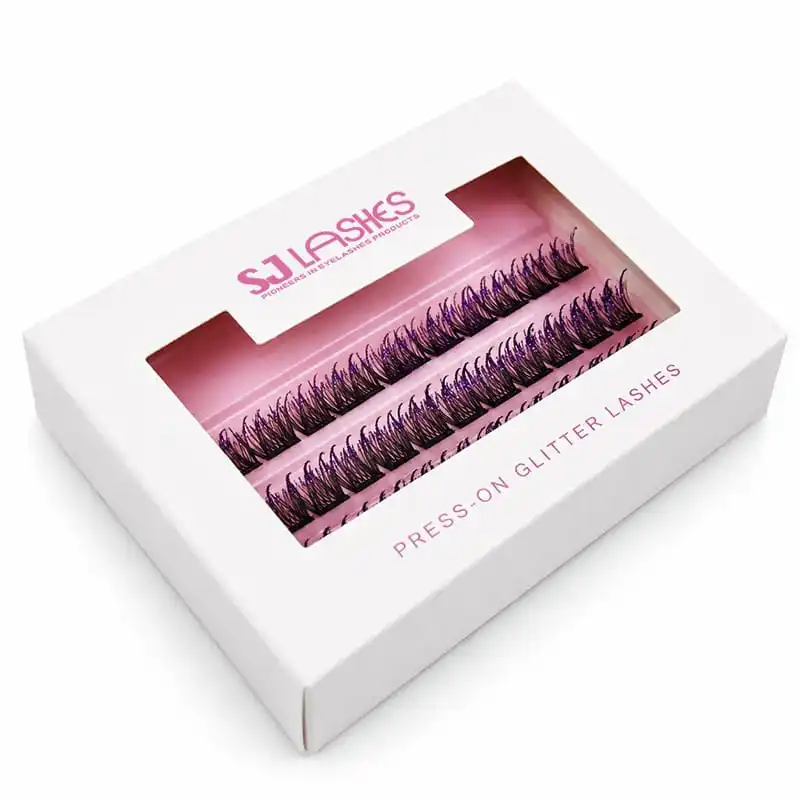
Let the Product Supply the Colour
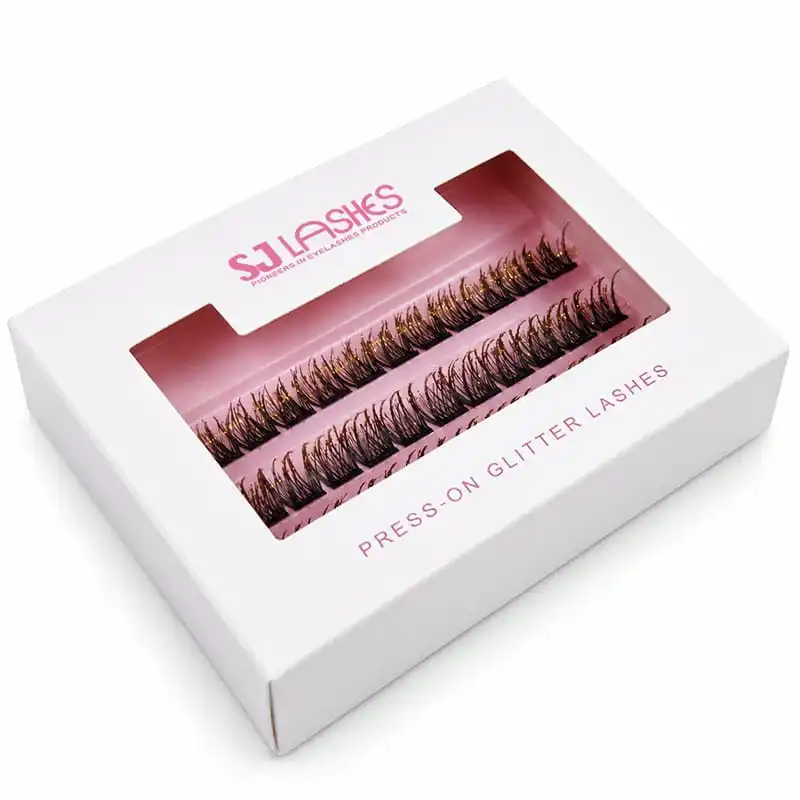
Same Box, Different Story — Gold Edition
How to specify it
- Colour range — how many colours launch together, and whether they are a permanent range or seasonal.
- Tray colour — a single tray colour across the range keeps the collection ordered; per-colour trays make the SKUs louder but looser.
- Window size — large enough to show all rows and the glitter effect, which is the selling feature.
- Line naming — the printed product-line name on the front panel should be short enough to read at thumbnail size.
- Bulk versus retail — confirm whether you need bulk trays for professional or refill use as well as retail boxes.
- Ink and material notes — glitter and colour work should be described accurately in any marketing copy rather than overclaimed.
Why the series has to read as one line
Three components, one palette, one typeface, one accent colour. In this series the system is:
- White as the base — sleeve, tray, carton and window box all sit on white, so the range occupies one visual block on a shelf or in a grid of product images.
- Pink as the single accent — used sparingly: the logo, the printed guides, the tray inside the window box. One accent used consistently reads as brand discipline; several accents read as noise.
- Metal as the premium cue — silver on the adhesive cap, and the glitter itself supplying the metallic character in the colour line.
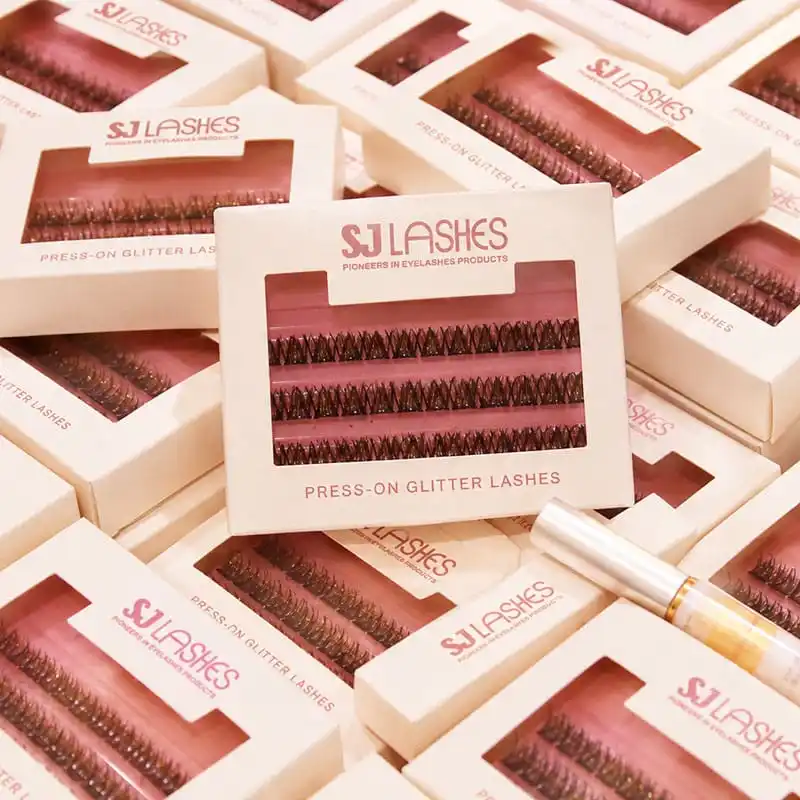
The Series Together — Where the Palette Does the Branding
The test to apply before you print anything: lay the segment box, the adhesive carton and one colour box side by side under the same light. If a customer would assume they came from three different brands, the series is not finished — regardless of how good each piece looks alone.
Supplier scorecard and sampling
What to ask a supplier
- Can you produce the segment box, the adhesive carton and the colour boxes as one coordinated run?
- What board, stock and finishing options do you offer across all three?
- Can you hold one Pantone accent across paper, carton and tube decoration?
- Can you source and decorate the adhesive container, or only the carton?
- What are the minimums per component, and can components be mixed in one first order?
- How do you handle row count, tray colour and printed guides as variables?
- What is the lead time for a new dieline versus a reorder?
- How are specifications archived so reorders match?
What to check on the samples
- Stack test. Put five segment boxes in a stack. Do they sit level, or does the pull tab lift one corner?
- Drawer test. Open one with a thumb. Does it slide without racking, and close flush?
- Guide legibility. Read the printed guides at arm's length and in low light.
- Palette test. Lay all three components together and check the accent colour under retail lighting, not on a monitor.
- Carton fit. Ensure the adhesive carton does not rattle and the tube does not shift.
- Applicator check. Test the brush on a lash band, not just on paper.
- Repeatability. Ask for two samples from different runs before committing to volume.
Channel notes
Marketplaces and DTC. The series is a bundle waiting to happen. Photograph the three components together — that single image communicates the range faster than three separate listings.
Professional and salon channels. Bulk segment trays and larger adhesive sizes matter more here than retail boxes. Confirm you can supply both tiers from the same production run.
Retail and gift. A coordinated series with a matching outer box turns four colours and an adhesive into a gift set without new artwork.
Distributors. Prepare a specification sheet per SKU covering dimensions, board, tray colour, row count, applicator type, volume, carton size, case pack, barcode plan and lead time.
Launch workflow
- Decide the series structure — which components launch, and which are added in a second wave.
- Fix the visual system — base colour, accent colour, metal tone and typeface, agreed before any artwork begins.
- Specify each component — rows and guides for the segment box, volume and applicator for the adhesive, colour range and trays for the colour line.
- Resolve label content — confirm what your target market requires on the adhesive carton and any outer box.
- Approve physical samples as a set — never approve components individually; the series is the product.
- Launch with a testable quantity across the range rather than deep stock on one SKU.
- Replenish what sells and extend the range — add colours, sizes or a gift configuration once the data is in.
Quote request checklist
- Target market and sales channel.
- Series structure: which components you want in the first wave.
- Segment box: row count, structure, sleeve and tray stock, logo placement, printed guides.
- Segment styles and lengths.
- Adhesive: volume, closure finish, applicator type, decoration method.
- Colour line: colours, tray colour, window size, line name.
- Finishing and accent colour, with a Pantone reference if you have one.
- Label content requirements for each market.
- Sample quantity and first order quantity.
- Delivery window and destination.
👉Send SJ LASHES your series requirement for a free sample and quote
Compliance and honest claims
A series multiplies the places where a claim can go wrong, so decide the wording once and apply it everywhere.
- Do not claim a wear duration or hold time unless the finished product documentation supports it for your market.
- Do not describe an adhesive as medical grade, hypoallergenic or safe for sensitive eyes without substantiation and market clearance.
- Always include patch-test guidance and a stop-use instruction on adhesive packaging where appropriate.
- Describe colour and glitter effects accurately in marketing copy; photographic glitter can be read as more dramatic than the product.
- Confirm mandatory label fields for the adhesive and any outer packaging in your target market before print — requirements differ between the US, the EU, the UK and Asia.
Getting this right is not only safer. It is what lets a distributor place a second order without opening a compliance file.
Why SJ LASHES
- One factory, one series. Segment boxes, adhesive cartons and colour boxes produced and coordinated together rather than assembled from three suppliers.
- Real DIY lash expertise across glue-free segments, press-on formats, glitter and colour segments, bulk trays and adhesive.
- Applied branding capability — direct printing, foil, labels and printed cartons across paper, tube and tray.
- Low MOQ for a first launch, so you can test a series structure before committing to volume.
- Locked specifications with archived samples, so a reorder six months later matches the first run.
- One visual language by design — we build the series to match itself, not just to match a brief.
👉Explore the cluster lashes sliding boxes range, cluster lashes paper boxes, the pre-glued DIY lash kit (press-on system) formats, the eyelash extensions glue line, or our full custom packaging service.
FAQ
Why launch a series instead of one strong product?
Because consumables and colour variations create repeat purchases, a coordinated range holds shelf space that a single SKU cannot, and bundling becomes possible without new artwork. A series also spreads the risk of a single format underperforming.
What should a DIY lash series include?
At minimum: the segment product, the adhesive that goes with it, and at least one variation that gives an existing customer a reason to buy again — a second colour, a different style, or a larger size.
How do you make three different products look like one brand?
Hold the base colour constant across every component, use a single accent colour sparingly, keep one metal tone for premium cues, and keep typefaces consistent. Then test by laying all components side by side under the same light.
Why does the slide-out drawer box work for glue-free segments?
Because the drawer presentation sequences the reveal — product first, brand half a second later — and because a slim, stackable box lets a shelf of them read as one block. A centred flat pull tab makes it work daily rather than just in photographs.
What are printed guides on the tray for?
They give each segment a position and a count, so a customer can follow a lash map and reorder the same style without guessing. It is a small print cost that reduces confusion during application.
Should the adhesive have its own box?
A printed carton adds retail presence and gives you a surface for mandatory information that a small tube cannot carry legibly. If you sell through marketplaces or retail, it is usually worth it.
Can the colour line share one box design?
Yes, and it usually should. Keeping the box identical and letting the product supply the colour makes a range of four colours read as one collection rather than four competing SKUs.
What should I send when requesting a quote for a series?
Your target market and channel, which components you want, row counts and segment styles, adhesive volume and applicator type, colour range and tray colour, your accent colour, label requirements, sample and first-order quantities, and your delivery window.
Final thought
A glue-free segment box wins a purchase. A series wins a routine: the segments run out, the adhesive runs out, and the customer comes back for the next colour.
Build the three components as one line, approve them as a set rather than separately, and let a single white block with one accent colour do your branding across the whole shelf.
👉Request a free sample and quote from SJ LASHES
For more packaging development, factory footage and application education, follow SJ LASHES on Instagram and read the SJ LASHES blog.